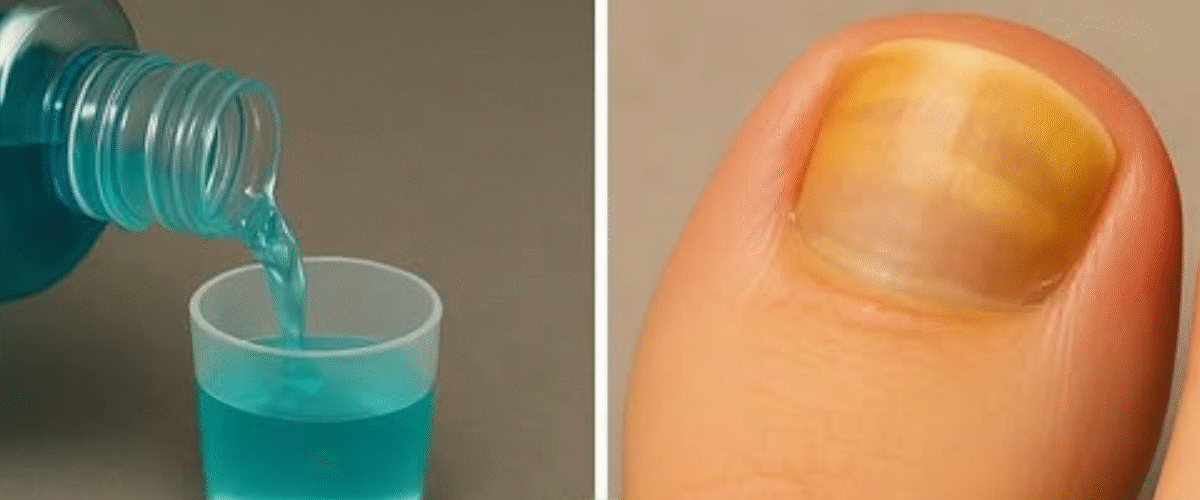
Nagelpilz ist mehr als nur ein kosmetisches Problem – es ist eine hartnäckige und oft peinliche Erkrankung, die zu Verfärbungen, Verdickungen und sogar zum Absplittern der Nägel führen kann. Doch bevor Sie zu teuren Behandlungen oder aggressiven Chemikalien greifen, sollten Sie dieses überraschend einfache Hausmittel in Betracht ziehen , bei dem Sie etwas verwenden, das Sie wahrscheinlich bereits in Ihrem Badezimmer haben: Mundwasser .
Ja, Mundwasser – dasselbe Produkt, das Sie gegen Mundgeruch verwenden – kann auch Ihre Geheimwaffe gegen Nagelpilz sein. Lassen Sie uns herausfinden, wie es funktioniert und wie Sie damit auf natürliche und effektive Weise klare, gesunde Nägel wiederherstellen können.
Warum Mundwasser bei Nagelpilz wirkt
Mundwasser enthält eine wirksame Mischung antiseptischer Inhaltsstoffe , darunter:
- Thymol – bekannt für seine antimykotischen und antibakteriellen Eigenschaften
- Eukalyptol – wirkt beruhigend und desinfizierend
- Menthol – reduziert Juckreiz und Reizungen
Diese Inhaltsstoffe töten Pilze nicht nur bei Kontakt ab , sondern dringen auch tief in den Nagel ein und verhindern so die Ausbreitung und das erneute Wachstum von Pilzinfektionen. Darüber hinaus kann die regelmäßige Anwendung von Mundwasser auf den Nägeln vorbeugend wirken und zukünftige Infektionen verhindern.
So verwenden Sie Mundwasser zur Behandlung von Nagelpilz
Es gibt zwei sehr wirksame Methoden, Mundwasser gegen Nagelpilz anzuwenden: Einweichen und direktes Auftragen.
1. Mundwasser-Fußbad
Diese Methode eignet sich ideal bei Nagelpilz oder wenn mehrere Nägel betroffen sind.
Zutaten:
- 1 Tasse antiseptisches Mundwasser (Listerine wird dringend empfohlen)
- 1 Tasse weißer Essig (optional, verstärkt aber die antimykotische Wirkung)
- Warmes Wasser
Anweisungen:
- Füllen Sie ein kleines Becken oder eine Wanne mit warmem Wasser.
- Geben Sie das Mundwasser und den Essig ins Wasser.
- Weichen Sie Ihre Füße (oder Hände) 15 bis 20 Minuten lang ein.
- Schrubben Sie die Nägel vorsichtig mit einer weichen Bürste oder einem Tuch, um Schmutz zu entfernen.
- Trocknen Sie Ihre Füße und Nägel gründlich ab – Feuchtigkeit fördert das Pilzwachstum.
- Wiederholen Sie dieses Bad täglich , bis sich die Infektion sichtbar bessert und verschwindet.
2. Direkte Anwendungsmethode
Dies ist eine schnellere Option zum gezielten Bearbeiten bestimmter Nägel.
Anweisungen:
- Tränken Sie einen Wattebausch mit unverdünntem antiseptischem Mundwasser.
- Direkt auf den betroffenen Nagel auftragen.
- 10–15 Minuten einwirken lassen.
- Abspülen und trocken tupfen.
- Für optimale Ergebnisse diesen Vorgang zweimal täglich wiederholen .
Tipps für schnellere Heilung und Vorbeugung
Um die Genesung zu beschleunigen und ein erneutes Auftreten zu verhindern, beachten Sie die folgenden Tipps:
- Halten Sie Ihre Nägel kurz : Schneiden Sie infizierte Nägel regelmäßig, um die Pilzbelastung zu reduzieren und eine Ausbreitung zu verhindern.
- Bleiben Sie trocken : Wählen Sie atmungsaktive Socken und Schuhe und wechseln Sie diese bei Bedarf täglich. Trockene Füße sind weniger anfällig für Pilzinfektionen.
- Desinfizieren Sie Nagelwerkzeuge : Reinigen Sie Nagelknipser, Feilen und Bürsten immer nach jedem Gebrauch, um eine erneute Infektion zu vermeiden.
- Gehen Sie in öffentlichen Bereichen wie Umkleideräumen oder Schwimmbädern nicht barfuß .
Abschließende Gedanken
Mundwasser mag wie ein unkonventionelles Heilmittel erscheinen, aber seine bewährten antiseptischen Inhaltsstoffe machen es zu einer hochwirksamen und leicht zugänglichen Behandlung von Nagelpilz. Mit täglicher Pflege, Geduld und Beständigkeit können Sie Ihre Nägel wieder in einen klaren, gesunden Zustand versetzen – ohne auf teure Medikamente oder aggressive Chemikalien angewiesen zu sein.
Wenn Sie also mit Nagelpilz zu kämpfen haben, probieren Sie dieses einfache Mittel aus. Ihre Füße (und Hände) werden es Ihnen danken.
20 Household Cleaning Products You Should Never Mix Together
I’m sure you’ve often mixed household ingredients together to try out some cleaning hacks, right?
From baking soda and vinegar, to ammonia and bleach, vinegar-water solution and many more. But did you know that these household products should not be used together?
Well, here’s why!
20 Household Cleaning Products You Should Never Mix Together
1. Bleach and Oven Cleaner
Never mix these two household cleaning products together, as this combination can produce chlorine gas that can cause lung, throat, nose and even eye irritation.
2. Ammonia and Bleach
When ammonia and bleach are mixed together, it creates a strong smell, which when inhaled can result in respiratory issues and throat burns too.
3. A Mix of Drain Cleaners
Never mix different drain cleanerstogether (to help unclog your drain more easily). While it will not do its job well, it will release chlorine gas. Also, sometimes, it can lead to an explosion.
4. Castile Soap and Vinegar
When these two products are mixed together, while not toxic, the outcome is a chunky messy mixture that doesn’t come of any use in terms of its effects. The acidic vinegar simply breaks down the castile soap.
5. Bleach and Dishwashing Detergent
Mixing bleach with dishwashing detergent can be dangerous as the combination can result in the formation of toxic gas.
6. Detergents and Disinfectants
When disinfectants are mixed with detergents, it will not do any good, as the detergent neutralizes the effects of the disinfectant.
7. Bleach and Drain Cleaner
When mixed together, this combination mixture can create a chlorine gas which (the fumes) is very dangerous to human health.
8. Bleach and Glass Cleaner
When bleach is mixed with glass cleaner, it can produce harmful toxic chemicals. This is because glass cleaners contain ammonia.
9. Lemon Juice and Bleach
When lemon juice is mixed with bleach, it creases chlorine gas, which an be harmful to human health.
10. Water and Vinegar (as a hard wood floor cleaner)
While this combination isn’t dangerous for health, the vinegar-water can damage the floor (if used on hard wood floors), as it is acidic in nature and dull its appearance.
11. Water with Pesticides
Never mix a pesticide with water, as these products when combined can release a dangerous phosphine gas.
12. A Mix of Different Cleaning Products
Mixing different cleaning products isn’t advisable for a couple of reasons. Firstly, one may neutralize the effect of the other. Secondly, they can cause chemical reactions.
13. Bleach and Lysol
Never mix Lysol (disinfectant) with bleach, as the bleach will oxidize the 2-benzyl-4-chlorophenol in the Lysol (or disinfectant) and can cause irritating and toxic compounds.
14. Vinegar and Baking Soda
One of the most common combinations! So mixing baking soda (a basic product), with vinegar (an acidic product), simply results in water. This doesn’t make the best cleaner. Whilst combing these two ingredients does generate some mighty impressive-looking bubbles that look like they should clean really well, in truth they don’t. Combining the two ingredients is not a good idea. It’s a waste of two green cleaning ingredients that work perfectly well independently of each other.
15. Toilet Cleaner and Bleach
Toilet cleaners are acidic in nature and when mixed with bleach, it can release toxic fumes that are dangerous to humans.
16. Rubbing Alcohol and Bleach
When these two products are combined, it can make chloroform! As you know, chloroform is not safe for humans and is toxic if inhaled.
17. Bleach and Vinegar
Most often, people consider this combination as a good disinfectant, but when mixed together, they release chlorine and chloramines gases which are toxic for humans and can cause eye, lung issues and chemical burs.
18. Vinegar and Hydrogen Peroxide
When these two substances are mixed together, they can form paracetic acid. This substance can be corrosive!
19. Bleach and Mildew Stain Remover
When these two products are combined, they produce chlorine gas, which can cause lung, throat, nose and eye irritation.
20. Bleach and Different Cleaning Products
Bleach must never be mixed with any cleaning products (like glass cleaners, toilet cleaners, dish cleaners, wood/floor cleaners etc.), as it can form chlorine gas which is harmful for human health, if it is inhaled.
Simple Salt Hack Helps Clean Sticky Irons and Improve Performance
Ironing clothes can be a frustrating task when your iron’s soleplate is dirty or sticky. Over time, residue from fabric softeners, starch, or synthetic materials can accumulate on the plate, causing it to drag, scorch fabrics, or leave unwanted marks. Fortunately, a simple household ingredient — salt — can help solve this common problem quickly and effectively.
The Trick: How It Works
This easy DIY cleaning method requires just two things: table salt and a hot iron. Start by sprinkling a generous layer of salt onto a sheet of parchment paper or a cotton cloth placed on your ironing board. Then, carefully run your heated iron over the salt in a back-and-forth motion for about 1–2 minutes. Make sure the steam function is turned off during this process.
The abrasive texture of the salt helps to dislodge and lift away stubborn buildup on the iron’s soleplate without scratching the surface. As a result, any sticky residue clinging to the plate is gently scrubbed off, leaving it smooth and clean.
Why It Works
Salt is a natural abrasive, making it perfect for safely removing grime without the need for harsh chemicals. Unlike traditional cleaners, this method doesn’t involve water or sprays, which could potentially damage the iron’s internal components if misused.
Benefits of This Cleaning Hack
- Improves Iron Performance: A clean soleplate glides more smoothly over fabric, making ironing quicker and more effective.
- Protects Clothes: Removing buildup reduces the risk of stains or burns on your garments.
- Eco-Friendly: No need for chemical cleaners — just a pantry staple!
- Cost-Effective: Saves you money by extending the life of your iron.
Safety Tips
Always make sure to unplug your iron and let it cool slightly before wiping the plate clean with a soft cloth after using the salt method. Avoid using coarse salt or scrubbing pads, which can damage the soleplate’s coating.
Conclusion
With just a sprinkle of salt and a few minutes of your time, you can restore your iron’s efficiency and protect your clothes from damage. It’s a smart, budget-friendly solution that every household should keep in their cleaning toolkit.
Great hacks every family needs
Cleaning your refrigerator regularly is always the first step, but there are also some surprisingly effective hacks that can keep odors at bay—many of them using everyday household items.
Toilet Paper: The Unexpected Odor Fighter
It might sound odd, but placing a roll of toilet paper inside your fridge works wonders. Toilet paper is highly absorbent, soaking up both excess moisture and unpleasant odors overnight. By morning, the smell is gone.
If you’re not comfortable with toilet paper near your food, there’s a simple alternative: newspaper. Lightly spray water on sheets, crumple them, and tuck them into fridge corners. You can also line compartments with newspaper and replace it weekly.
Other Household Hacks That Work
- Bread: A slice of bread absorbs moisture while leaving behind a mild, pleasant aroma. Replace monthly.
- Citrus Peels: Orange or tangerine peels not only refresh the fridge with a zesty fragrance but also fight odor. Keep for three days, then replace.
- Baking Soda: Place a small open container of baking soda inside the fridge. It’s a classic deodorizer that works continuously.
- Fresh Lemons: Cut lemons into slices and place them around compartments for a natural citrus scent.
- Dried Tea Leaves: About 50 grams of dried tea absorbs odors for up to a month. Dry the leaves in the sun and reuse.
- Coffee Grounds: Like tea, coffee grounds are powerful odor absorbers. Place them in a small cup or cloth bag and replace every three weeks.
Fresh, Clean, and Affordable
These hacks are easy, eco-friendly, and inexpensive. Instead of masking bad smells with chemical sprays or deodorizers, they use natural absorbents to freshen the air inside your fridge.
The next time your refrigerator develops an unwelcome odor, remember: the solution may already be sitting in your kitchen cabinet.