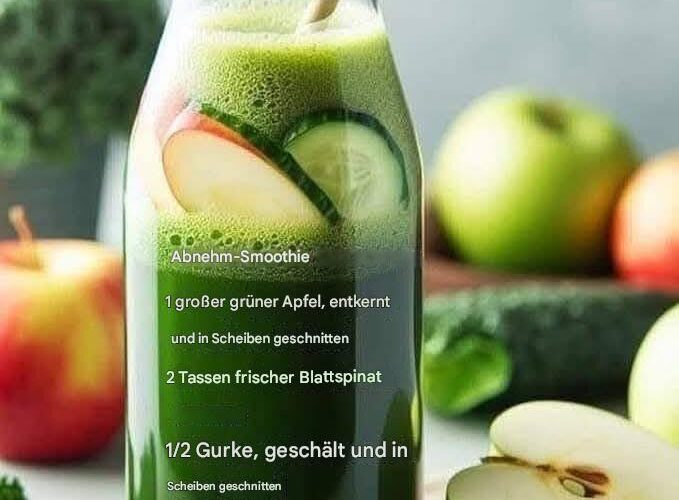
🥤 Grüner Smoothie zum Abnehmen – erfrischend und voller Nährstoffe!
Ein leichter, feuchtigkeitsspendender und den Stoffwechsel anregender Smoothie, der perfekt für einen gesunden Start in den Tag ist! 💚
📋 Zutaten (Portionen: 1-2):
✔ 1 großer grüner Apfel – Natürliche Süße und Ballaststoffe 🍏
✔ 2 Tassen frische Spinatblätter – Vollgepackt mit Vitaminen und Antioxidantien 🌿
✔ ½ Gurke, geschält und in Scheiben geschnitten – Hydratisierend und erfrischend 🥒
✔ Saft von 1 Limette – Gibt einen spritzigen Kick und fördert die Verdauung 🍋
✔ 1 Tasse kaltes Wasser oder Kokoswasser – Für eine glatte Mischung 💧
✔ Eiswürfel (optional) – Für zusätzliche Kühlung ❄️
👩🍳 Anleitung:
1️⃣ Bereiten Sie die Zutaten vor:
- Den grünen Apfel entkernen und klein schneiden .
- Die Gurke schälen und in Scheiben schneiden .
2️⃣ Mixen, bis eine glatte Masse entsteht:
- Geben Sie Apfel, Spinat, Gurke, Limettensaft und Wasser in einen Mixer .
- Mixen, bis eine glatte Masse entsteht.
- Für einen gekühlten Smoothie können Sie nach Belieben Eiswürfel hinzufügen.
3️⃣ Servieren und genießen!
- Für die beste Frische in ein Glas gießen und sofort trinken!
📊 Nährwertangaben (pro Portion):
🔸 Kalorien: ~90 kcal
🔸 Kohlenhydrate: ~22 g
🔸 Protein: ~2 g
🔸 Ballaststoffe: ~5 g
🔸 Fett: ~0,5 g
💚 Gesundheitliche Vorteile:
✔ Hilft beim Abnehmen – Kalorienarm, aber ballaststoffreich, sodass Sie länger satt bleiben 🥗
✔ Regt den Stoffwechsel an – Limetten und Spinat helfen, die Fettverbrennung zu verbessern 🔥
✔ Verbessert die Verdauung – Gurken- und Limettensaft unterstützen die Darmgesundheit und reduzieren Blähungen 🌱
✔ Spendet Feuchtigkeit und entgiftet – Gurken- und Kokoswasser spülen Giftstoffe aus 💧
✔ Unterstützt das Immunsystem – Vollgepackt mit Vitamin C, A und Antioxidantien, um Sie stark zu halten 🛡️
💡 Tipps & Variationen:
✔ Proteinschub – Geben Sie einen Löffel pflanzliches Proteinpulver hinzu 🥤
✔ Extra Cremigkeit – Mischen Sie eine halbe Banane oder eine ¼ Avocado unter 🥑🍌
✔ Superfood-Power – Geben Sie 1 EL Chia- oder Leinsamen für Ballaststoffe und Omega-3-Fettsäuren hinzu 🌱
✔ Detox-Upgrade – Ersetzen Sie Wasser durch grünen Tee, um den Stoffwechsel anzukurbeln 🍵
⏱️ Gesamtzeit:
✔ Vorbereitungszeit: 5 Min.
✔ Mixzeit: 1 Min.
✔ Gesamtzeit: 6 Min.
Dieser grüne Smoothie zum Abnehmen ist hydratisierend, erfrischend und voller Nährstoffe, die Ihre Gesundheitsziele unterstützen! Möchten Sie Ingwer für einen zusätzlichen Entgiftungsschub hinzufügen? 🌱✨
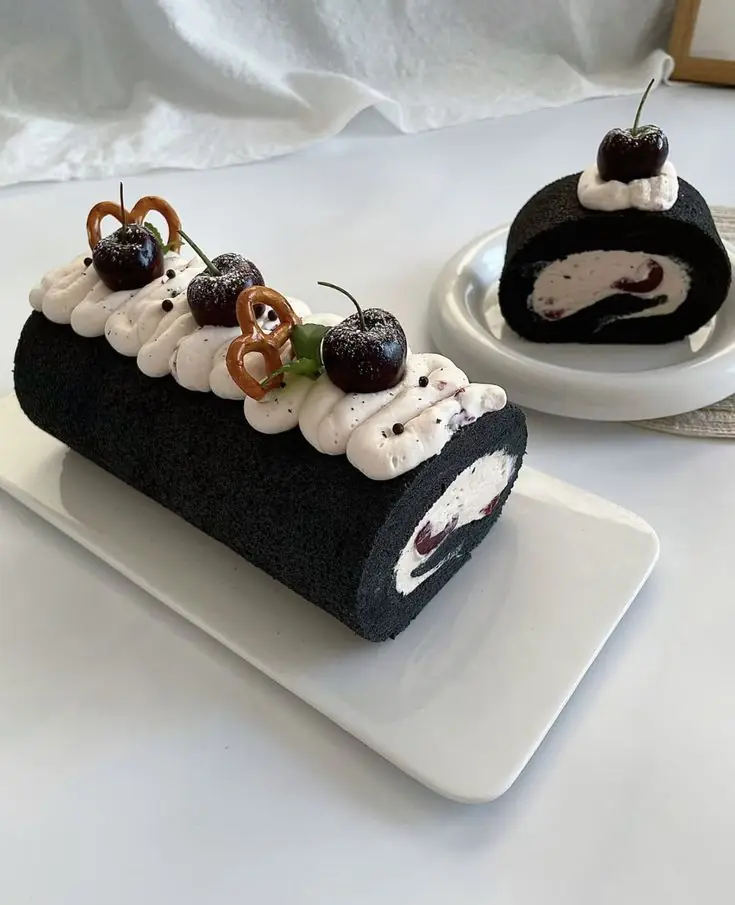
🍫 Black Cocoa Cherry Swiss Roll
Ingredients
Sponge Cake
- 4 large eggs (room temperature)
- ¾ cup sugar
- 2 tbsp vegetable oil
- 2 tbsp milk
- ½ cup cake flour (or all-purpose flour sifted well)
- ¼ cup black cocoa powder (or regular unsweetened cocoa)
- 1 tsp vanilla extract
- Pinch of salt
Cherry Cream Filling
- 1 cup heavy cream (cold)
- 3 tbsp powdered sugar
- ½ tsp vanilla extract
- ½ cup fresh or canned cherries, chopped (plus some whole for garnish)
Optional Decoration
- Extra whipped cream
- Pretzels
- Whole cherries
- Chocolate drizzle or chips
Instructions
1. Make the Sponge
- Preheat oven to 350°F (175°C). Line a 10×15-inch jelly roll pan with parchment.
- Beat eggs and sugar together until pale, thick, and tripled in volume (about 5–6 min with mixer).
- Add oil, milk, vanilla; mix gently.
- Sift in flour, cocoa, and salt; fold gently with spatula until just combined.
- Spread batter evenly in prepared pan.
- Bake 12–15 min (cake springs back when touched).
- While warm, roll the cake gently with parchment into a log. Cool completely.
2. Make the Cherry Cream
- Beat heavy cream, powdered sugar, and vanilla until soft peaks.
- Fold in chopped cherries gently.
3. Assemble
- Unroll cooled cake carefully. Spread cherry cream evenly.
- Re-roll gently but firmly, using parchment to help.
- Chill at least 1 hr for clean slices.
4. Decorate
- Pipe extra whipped cream on top.
- Garnish with whole cherries, pretzels, or chocolate drizzle.
Tips
- Roll the cake while still warm to avoid cracking.
- For deeper color and rich taste, use black cocoa but Dutch-process cocoa also works.
- Refrigerate for a few hours for best slicing and neat swirls.
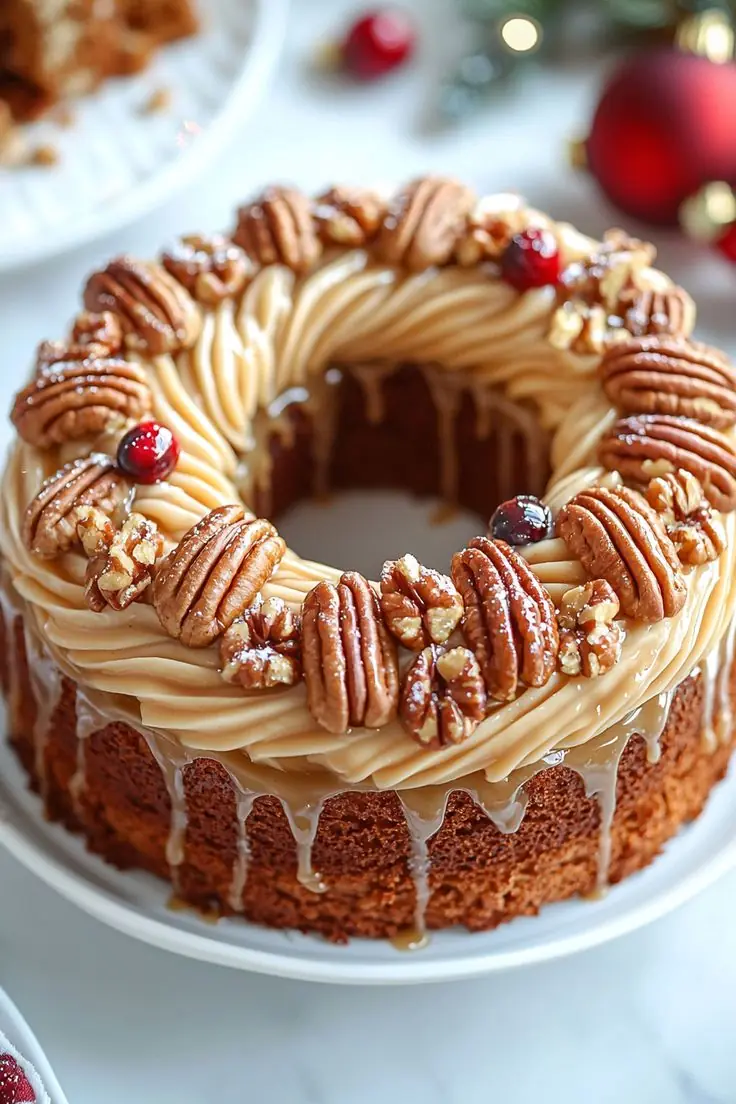
Brown Sugar Pecan Bundt Cake
Ingredients
For the Cake
- 2 ½ cups (315 g) all-purpose flour
- 2 ½ tsp baking powder
- ½ tsp baking soda
- 1 tsp cinnamon
- ½ tsp salt
- 1 cup (230 g) unsalted butter, softened
- 1 ½ cups (300 g) brown sugar (light or dark)
- ½ cup (100 g) granulated sugar
- 3 large eggs, room temperature
- 1 cup (240 g) sour cream or plain Greek yogurt
- 1 tbsp vanilla extract
- ½ cup (120 ml) whole milk
- 1 ½ cups (150 g) chopped pecans (toasted for extra flavor)
For the Brown Butter Glaze
- ½ cup (115 g) unsalted butter
- 2 cups (240 g) powdered sugar, sifted
- ¼ cup (60 ml) heavy cream (more if needed for consistency)
- 1 tsp vanilla extract
- Pinch of salt
For Decoration
- Whole pecans, candied pecans, or toasted chopped pecans
- Fresh cranberries (optional, for festive look)
Instructions
1. Make the Cake
- Preheat oven to 350°F (175°C). Grease and flour a bundt pan very well.
- In a medium bowl, whisk together flour, baking powder, baking soda, cinnamon, and salt. Set aside.
- In a large bowl, beat butter, brown sugar, and granulated sugar until light and fluffy (about 3 minutes).
- Add eggs one at a time, beating well after each. Mix in sour cream and vanilla.
- Alternate adding dry ingredients and milk to the wet batter, starting and ending with dry. Mix just until combined. Fold in chopped pecans.
- Pour batter evenly into the prepared bundt pan. Smooth top.
2. Bake
- Bake for 45–55 minutes, or until a toothpick inserted comes out clean.
- Cool in the pan 15–20 minutes before inverting onto a wire rack to cool completely.
3. Make Brown Butter Glaze
- In a small saucepan, melt butter over medium heat. Let it cook until golden brown and fragrant (about 4–5 minutes). Remove from heat and cool slightly.
- Whisk in powdered sugar, vanilla, salt, and cream until smooth and pourable (add more cream if too thick).
4. Assemble & Decorate
- Pour glaze generously over the cooled bundt cake, letting it drip down naturally.
- Pipe or swirl extra frosting if you want a fancy look.
- Garnish with whole pecans, candied pecans, and cranberries.
✨ Tips:
- Toast pecans first (350°F for 8–10 min) for a richer nutty flavor.
- Make ahead: Cake stays moist for up to 3 days covered at room temperature.
Blueberry Breakfast Quesadillas: The 10-Minute Morning Miracle You’ll Make on Repeat
(Engaging Introduction – The Hook)
Forget everything you know about quesadillas being just for lunch. Imagine, instead, a warm, crispy tortilla, its pockets filled with sweet, bursting blueberries and creamy, melted cheese, all dusted with a snowy sprinkle of powdered sugar. This isn’t a dream; it’s your new reality for a spectacularly easy morning. Blueberry Breakfast Quesadillas are the brilliant, 10-minute meal that will revolutionize your breakfast routine, banish morning boredom, and make you feel like a gourmet chef without any of the effort. They are the perfect harmony of sweet and savory, offering a protein-packed, satisfying start to the day that feels more like a treat than a meal. Get ready to make mornings magical.
Why This Recipe is a Breakfast Game-Changer
- 10-Minute Morning Savior: From fridge to plate in the time it takes to brew your coffee. Perfect for hectic school days and lazy weekends alike.
- The Perfect Flavor Balance: The combination of sweet, jammy berries and rich, savory cheese is a sophisticated and utterly addictive flavor experience.
- Kid-Approved & Adult-Adored: This is the rare recipe that will have both kids and parents equally excited for breakfast. It’s fun to eat and delicious to the last bite.
- Endlessly Customizable: Use fresh or frozen berries, switch up the cheese, or add extras like nuts or a drizzle of honey to make it your own.
Gathering Your Ingredients: Simple Morning Magic
The genius of this recipe lies in its simplicity and the magic of its ingredients.
The Core Components:
- 2 large (10-inch) flour tortillas (or 4 small taco-sized)
- ½ cup fresh blueberries (or frozen, do not thaw)
- ⅔ cup shredded cheese (a blend is best! See notes below)
- 1 teaspoon butter or neutral oil (for cooking)
- The Cheese Blend Key: A mix of mozzarella (for its epic melt) and cream cheese (for tangy creaminess) is ideal. Shredded cheddar or Monterey Jack also work well for a sharper flavor.
The Flavor Enhancers (Optional but Recommended):
- 1 tablespoon cream cheese, softened
- ½ teaspoon vanilla extract
- ½ teaspoon lemon zest (brightens the berries perfectly)
- A pinch of cinnamon or nutmeg
For Serving (The Grand Finale):
- Powdered sugar, for dusting
- Maple syrup, for drizzling
- Extra blueberries
- A dollop of Greek yogurt or whipped cream
The Step-by-Step Method: 10 Minutes to Bliss
Prep Time: 5 mins | Cook Time: 5 mins | Serves: 1-2
Step 1: The Flavorful Fill
In a small bowl, gently toss the blueberries with the lemon zest and a pinch of cinnamon if using.
If you’re using cream cheese, spread a thin layer over one half of each tortilla, leaving a small border around the edge. This acts as a delicious glue.
Step 2: Assemble with Care
Sprinkle a layer of shredded cheese over the entire tortilla. Scatter the blueberries evenly over one half of the tortilla. Top the blueberries with another light sprinkle of cheese—this helps everything stick together.
Fold the other half of the tortilla over the filling, creating a perfect half-moon.
Step 3: Cook to Golden, Crispy Perfection
Heat a skillet or griddle over medium heat. Add the butter or oil.
Carefully place the quesadilla in the skillet. Cook for 2-3 minutes, until the bottom is golden brown and crispy.
Gently flip using a spatula. Cook for another 2-3 minutes on the second side, pressing down lightly, until the tortilla is crisp and you can see the cheese is fully melted.
Step 4: The Grand Finale
Remove the quesadilla from the skillet and let it rest on a cutting board for just one minute (this allows the cheese to set slightly).
Slice into wedges. Dust generously with powdered sugar, drizzle with maple syrup, and serve immediately with extra berries and a dollop of yogurt on the side.
Chef’s Notes: Pro-Tips for a Flawless Quesadilla
- The Cheese is Key: Using a combination of a great melting cheese (like mozzarella) and a flavor cheese (like cheddar or cream cheese) creates the ultimate texture and taste.
- Don’t Overfill: This is the golden rule of quesadillas. Too much filling will cause it to spill out and make flipping difficult. A light, even layer is best.
- Medium Heat is a Must: Cooking over too high of heat will burn the tortilla before the cheese has a chance to melt. Be patient for the perfect golden brown crisp.
- The Frozen Berry Hack: Using frozen blueberries is a fantastic option! Do not thaw them, as they will release too much water. Add them directly from the freezer to the tortilla.
Frequently Asked Questions (FAQ)
Q: Can I make these ahead of time?
A: You can assemble them ahead of time, wrap them tightly in plastic wrap, and keep them in the fridge for a few hours before cooking. For best results, cook them fresh.
Q: Are there other fruit options?
A: Absolutely! Sliced strawberries, peaches, raspberries, or a mix of berries all work wonderfully. Just ensure they are cut to a small size.
Q: Can I make this recipe healthier?
A: Yes! Use whole wheat tortillas, low-fat cheese, and skip the powdered sugar. The Greek yogurt adds a great protein boost.
Q: My quesadilla is soggy. What happened?
A: Sogginess is usually caused by too much filling or heat that’s too low, which steams the tortilla instead of crisping it. Ensure your pan is properly preheated and don’t overfill.