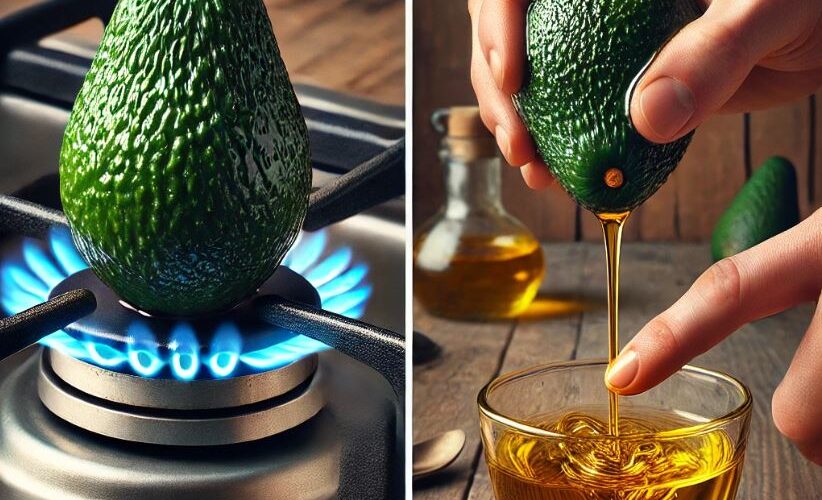
Avocados sind mehr als nur ein cremiges, köstliches Superfood – sie bergen ein ungenutztes Potenzial, das nur darauf wartet, entdeckt zu werden! Während die meisten Menschen sie frisch genießen, wissen nur wenige, dass man reines Avocadoöl mit einer einfachen Methode auf dem Herd zu Hause herstellen kann. Diese Technik verwandelt überreife Avocados in flüssiges Gold und liefert ein nährstoffreiches, selbstgemachtes Öl zum Kochen, für die Hautpflege und das allgemeine Wohlbefinden.
🌟 Warum sollten Sie Ihr eigenes Avocadoöl herstellen?
💚 Null Abfall: Lassen Sie überreife Avocados nicht verderben – machen Sie etwas Wertvolles daraus!
💚 Vollgepackt mit Nährstoffen: Avocadoöl ist vollgepackt mit gesunden Fetten, Antioxidantien und Vitaminen , die die Herzgesundheit, die Hautfeuchtigkeit und die Gehirnfunktion unterstützen.
💚 Ganz natürlich und ohne Konservierungsstoffe: Anders als im Laden gekaufte Öle ist Ihr selbstgemachtes Avocadoöl rein und frei von Chemikalien .
🥑 Schritt-für-Schritt-Anleitung: Avocadoöl zu Hause extrahieren
1️⃣ Avocados auswählen und vorbereiten
✔ Wählen Sie überreife Avocados (die zu weich zum Essen, aber nicht verdorben sind).
✔ Schneiden Sie sie in zwei Hälften, entfernen Sie den Kern und löffeln Sie das Fruchtfleisch in eine Schüssel.
2️⃣ Die Avocados zerdrücken
✔ Verwenden Sie eine Gabel oder einen Mixer, um eine glatte, cremige Paste herzustellen.
✔ Je feiner das Püree, desto besser die Ölextraktion.
3️⃣ Sanft erhitzen
✔ Die zerdrückte Avocado in einen Topf geben.
✔ Bei schwacher Hitze unter gelegentlichem Rühren kochen. Nicht überhitzen – durch sanftes Erwärmen kann sich das Öl auf natürliche Weise trennen.
4️⃣ Extrahieren Sie das Öl
✔ Sobald Sie sehen, dass sich Öl bildet, nehmen Sie die Avocado vom Herd.
✔ Verwenden Sie ein feinmaschiges Sieb oder ein Käsetuch, um das Öl vom Fruchtfleisch zu trennen .
✔ Drücken Sie leicht, um jeden Tropfen reines Avocadoöl aufzufangen .
5️⃣ Aufbewahren & Verwenden
✔ Gießen Sie das goldgrüne Öl in einen sauberen, luftdichten Behälter. ✔ Lagern Sie es für maximale Frische
an einem kühlen, dunklen Ort .
🌿 Vorteile von Avocadoöl
✅ Herzgesund – Hilft, schlechtes Cholesterin zu senken und unterstützt die Herz-Kreislauf-Funktion.
✅ Stärkt Haut und Haar – Natürliche Feuchtigkeitscreme, die hydratisiert und nährt.
✅ Entzündungshemmend – Bekämpft oxidativen Stress und reduziert Entzündungen im Körper.
✅ Unterstützt die Gehirngesundheit – Enthält Verbindungen, die vor neurodegenerativen Erkrankungen schützen.
✅ Gleicht den Blutzucker aus – Eine großartige Ergänzung für Menschen mit Diabetes oder Stoffwechselproblemen.
🍽️ So verwenden Sie selbstgemachtes Avocadoöl
🥗 Für ein geschmeidiges, buttriges Finish über Salate träufeln
. 🍳 Zum Kochen verwenden – der hohe Rauchpunkt macht es ideal zum Sautieren.
🧴 Als natürliche Feuchtigkeitscreme auf Haut und Haar auftragen
. 🌿 Für Anti-Aging- und Feuchtigkeitsvorteile in selbstgemachte Hautpflegeprodukte mischen .
✨ Probieren Sie es noch heute aus und entdecken Sie die Magie von selbstgemachtem Avocadoöl!
Mit dieser einfachen, abfallfreien Methode holen Sie das Beste aus Ihren Avocados heraus. Probieren Sie es aus und erleben Sie die reine, natürliche Güte des Avocadoöls .
Sliced Baked Potatoes: The Crispy, Flavor-Packed Side Dish That Steals Every Show
Tired of the same old boring side dishes? Do your baked potatoes emerge from the oven soft and steamy, but lacking that irresistible, crave-worthy crunch? You are not alone. For decades, home cooks have struggled to achieve restaurant-quality texture and flavor in their potato dishes.
But what if we told you there was a simple, almost magical method to transform the humble spud into a stunning culinary showstopper? A potato so perfectly cooked it features a crispy, golden-brown exterior that gives way to a cloud-like, fluffy interior in every single bite.
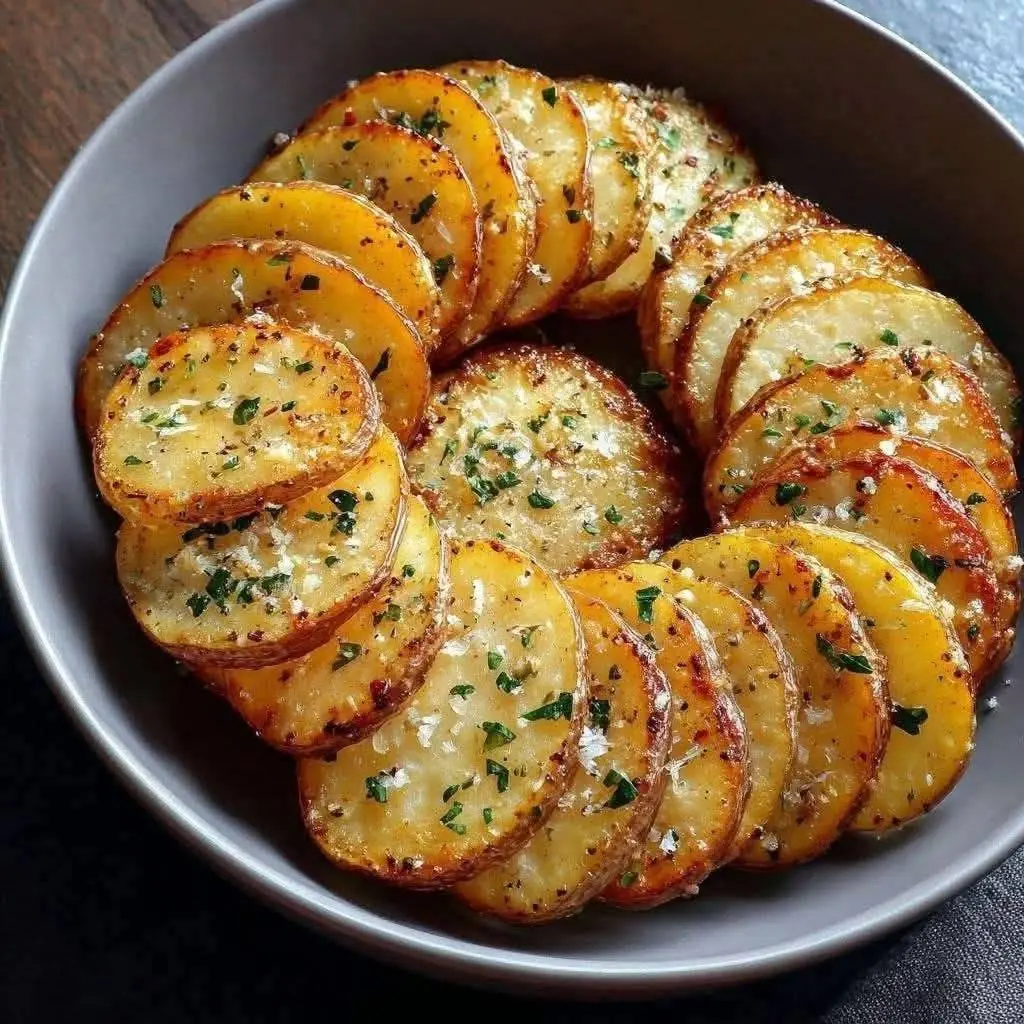
Welcome to the world of Sliced Baked Potatoes. This isn’t just a recipe; it’s a revelation. By making a series of thin, accordion-style slices before baking, you create maximum surface area for roasting. This ingenious technique allows heat and seasoning to penetrate deeply, resulting in a potato that is impossibly crispy on the outside and tender on the inside.
Prepare to elevate your dinner game, impress your family, and never look at a potato the same way again.
Why This Method is a Total Game-Changer
You might be wondering, what makes these sliced potatoes so special? The science is simple but brilliant.
- Maximum Crisp Factor: The slices fan out during baking, exposing countless edges to the direct heat of the oven. Each one of these edges becomes a tiny, deliciously crispy chip.
- Flavor in Every Nook and Cranny: All those slices create pockets and channels for melted butter, rich oils, garlic, herbs, and cheese to seep into, ensuring every single mouthful is bursting with flavor—no more bland centers!
- Visual Wow-Factor: Let’s be honest, food that looks good tastes better. These potatoes are gorgeous on the plate, making them perfect for weeknight dinners and holiday feasts alike.
- Endless Customization: They are the perfect blank canvas for your favorite flavors, from simple rosemary and garlic to fully loaded bacon and cheddar versions.
Gathering Your Ingredients for Perfection (Serves 4)
This recipe focuses on classic, foolproof flavors that let the potato itself shine.
The Foundation:
- 4 medium-sized Russet potatoes (or Yukon Golds for a creamier texture)
- 3 tablespoons olive oil or melted unsalted butter
- 1 teaspoon garlic powder
- 1 teaspoon paprika (smoked paprika is incredible here!)
- Kosher salt and freshly cracked black pepper to taste
The Flavor Boosters (Optional):
- 2 tablespoons freshly grated Parmesan cheese
- 2 tablespoons finely chopped fresh parsley or chives
- Sour cream or Greek yogurt for serving
Your Step-by-Step Blueprint to Potato Greatness
Follow these simple steps for guaranteed perfect results every single time.
Step 1: Prep the Potatoes
Scrub the potatoes thoroughly under cold water to remove any dirt. Pat them completely dry with a kitchen towel. This is crucial for achieving crispiness!
Step 2: The Secret to Perfect Slicing (No Mistakes!)
Place a potato on a large spoon or between two chopsticks. This will act as a guardrail, preventing your knife from slicing all the way through the potato. Using a sharp knife, make thin, parallel slices about ¼-inch apart along the entire length of the potato, stopping when your knife hits the spoon. Repeat with all potatoes.
Step 3: Season Generously
Place the sliced potatoes on a parchment-lined baking sheet. Gently fan them open slightly. Drizzle with olive oil, making sure to get in between the slices as much as possible. Season generously with the garlic powder, paprika, salt, and pepper, again working the seasoning into the cuts.
Step 4: Bake to Golden Perfection
Preheat your oven to 400°F (200°C). Bake the potatoes for 45-55 minutes. Halfway through the baking time, remove the tray and carefully baste the potatoes with the oil/butter that has collected at the bottom of the pan. This ensures even browning and incredible flavor.
Step 5: The Finishing Touches
For an extra cheesy crust, sprinkle the grated Parmesan cheese over the potatoes in the last 10 minutes of baking. They are done when the tops are golden brown and crispy and the centers are fork-tender.
Garnish with fresh parsley or chives and serve immediately with a cool dollop of sour cream.
7 Incredible topping ideas to keep it exciting
Don’t stop at the basic recipe! The true beauty of this dish is its versatility.
- Fully Loaded: Top with crispy bacon bits, shredded cheddar cheese, a scoop of sour cream, and sliced green onions.
- Italian Herb: Brush with garlic-infused olive oil and tuck fresh rosemary and thyme leaves between the slices before baking.
- Truffle Parmesan: Drizzle with truffle oil and finish with a generous shower of Parmesan cheese.
- Spicy Buffalo: Toss in a mixture of melted butter and buffalo hot sauce. Serve with blue cheese crumbles and a side of ranch.
- Greek Style: After baking, top with crumbled feta cheese, chopped kalamata olives, diced cucumbers, and a tzatziki sauce.
- BBQ Ranch: Drizzle with your favorite BBQ sauce and top with Monterey Jack cheese, corn, and a drizzle of ranch dressing.
- Everything Bagel: Brush with butter and press Everything Bagel seasoning into every crevice before baking.
Frequently Asked Questions (FAQ)
Q: What are these called? I’ve seen them before.
A: You’re likely thinking of Hasselback Potatoes, named after the Hasselbacken restaurant in Stockholm where they were first popularized. This is the classic method!
Q: Can I make these ahead of time?
A: Absolutely! You can slice and season the potatoes a few hours in advance. Keep them covered in the refrigerator until you’re ready to bake. You may need to add a few extra minutes to the baking time if they go in cold.
Q: Why won’t my slices fan out?
A: You may not have sliced deep enough. Using the spoon or chopstick method ensures you go about 90% of the way through. Also, baking them at a high enough temperature is key to forcing them to open up and crisp.
Q: Are they better with butter or oil?
A: Both work wonderfully. Butter provides a richer, more classic flavor, while olive oil offers a slightly cleaner taste and can achieve a higher crispiness. For the best of both worlds, use a combination!
White Stuff on Your Peach Pit – What Does It Mean?
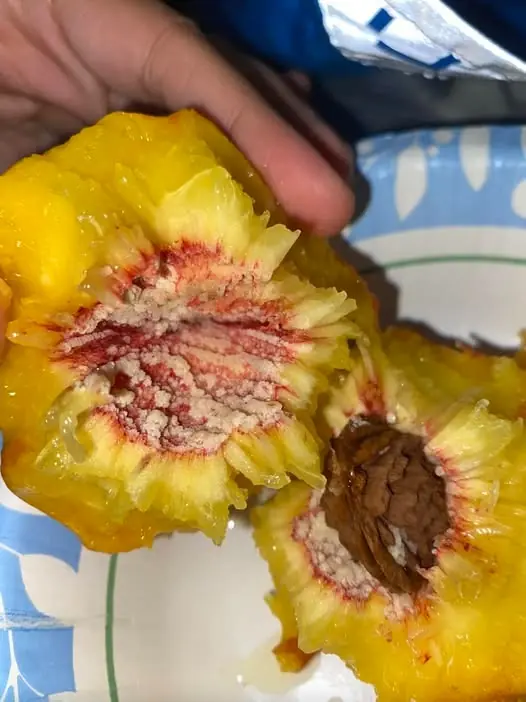
You bite into a perfectly ripe, juicy peach — sweet, fragrant, and summery — only to pause at the pit. There it is: a patch of white, fleshy-looking tissue clinging to the hard shell. Your first thought? Is this mold? Is the fruit spoiled? Did I just eat something dangerous? Take a deep breath.
No, it’s not mold.
No, your peach isn’t bad.
And yes — it’s completely safe to eat. That mysterious white stuff is called peach callus tissue, and it’s a natural, harmless part of the fruit’s growth process. In fact, it’s a sign of a healthy, developing peach — not something to fear, but something to appreciate. What Is Peach Callus Tissue?
Peach callus tissue is a mass of undifferentiated cells that forms on or around the seed (pit) during the fruit’s development. These cells are like biological “blank slates” — they haven’t yet decided what they’ll become. In scientific terms, they’re meristematic, meaning they have the potential to grow into various plant tissues, like roots or shoots, under the right conditions. Think of it like this:
Just as a child might explore different hobbies before finding their passion, these cells are in a transitional phase, waiting for the right signals to develop into something more specific. This tissue often appears as a creamy, white, gel-like or soft fleshy growth on the surface of the pit — especially when the peach is very ripe or overripe. Why Does It Form?
Callus tissue develops as part of the peach’s natural reproductive and protective process. As the fruit matures, the pit undergoes internal changes. Sometimes, hormonal shifts or minor stress (like uneven growth or minor damage) trigger the formation of this tissue. It’s essentially the pit’s way of protecting itself — a kind of biological “band-aid” or shield that helps maintain the integrity of the seed, ensuring it stays viable for germination if the fruit ever lands in the right soil. And contrary to what some might think, this isn’t a sign of disease or contamination — it’s just nature doing its thing. Is It Safe to Eat?
✅ Yes — 100% safe.
The presence of callus tissue does not affect the safety or flavor of the fruit. You can eat the peach without worry. That said, most people choose to discard the pit and the tissue on it — not because it’s harmful, but because it’s not appetizing and doesn’t taste like anything in particular. If you’re growing peaches at home or saving seeds for planting, this tissue can actually be a positive sign — it shows the seed is biologically active and capable of regeneration. Callus Tissue vs. Mold — How to Tell the Difference
It’s understandable to confuse the two, but here’s how to tell them apart: Found only on or near the pit
Can appear anywhere on the fruit (flesh, skin, stem)
Creamy, firm, fleshy texture
Fuzzy, powdery, or slimy
No bad smell
Often has a musty, sour, or rotten odor
Only appears in ripe or overripe peaches
Can appear even in firm fruit, especially if stored poorly
If the rest of the peach smells sweet and looks fresh, and the white stuff is confined to the pit, it’s almost certainly callus tissue — not mold. Can You Grow a Peach Tree from a Pit with Callus Tissue?
Absolutely!
In fact, the presence of callus tissue may indicate that the seed is viable and biologically active. Gardeners and horticulturists sometimes encourage callus formation in labs to help propagate fruit trees. If you’re feeling adventurous, you can: Clean the pit thoroughly.
Let it dry and plant it in well-draining soil.
Be patient — it can take months to germinate.
Just remember: most commercial peaches come from grafted trees, so your homegrown tree might not produce the same quality of fruit — but it’ll still be a labor of love. Final Thoughts: Nature’s Hidden Wonder
That little patch of white on your peach pit isn’t a flaw — it’s a quiet miracle of biology. It’s a reminder that even in the fruit we eat every day, life is still at work — growing, protecting, and preparing for the next generation. So next time you enjoy a juicy peach and spot that mysterious white tissue, don’t panic.
Pause. Smile.
And appreciate the quiet magic happening inside your summer snack. 🍑 Nature isn’t always perfect — but it’s always fascinating.
Happy peach season!
🥩 Perfect Pan-Seared Steak with Garlic Butter
Servings: 2
Prep time: 10 minutes
Cook time: 10–12 minutes
Resting time: 5 minutes
Ingredients
- 2 ribeye or sirloin steaks (1–1.5 inches thick, about 12 oz/340 g each)
- 2 tbsp olive oil or vegetable oil
- 3 tbsp unsalted butter
- 3–4 garlic cloves, smashed
- 2–3 sprigs fresh rosemary or thyme
- Salt — preferably coarse sea salt or kosher salt
- Freshly ground black pepper
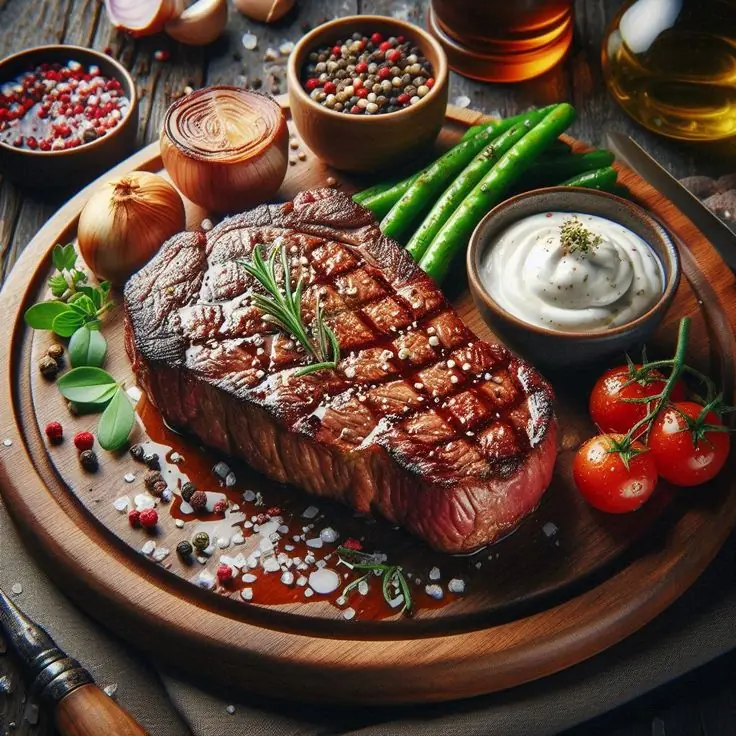
Optional sides (as shown)
- Fresh green beans, blanched
- Cherry tomatoes
- Grilled onions
- Peppercorn sauce or garlic cream sauce
Instructions
- Bring steaks to room temperature
- Take steaks out of the fridge 30–40 minutes before cooking. Pat dry with paper towels — dry surface = better crust.
- Season generously
- Coat both sides with olive oil, then sprinkle generously with salt and black pepper.
- Preheat your pan
- Use a heavy cast-iron or stainless-steel skillet. Heat over medium-high until very hot — a drop of water should sizzle immediately.
- Sear the steak
- Add a bit of oil. Place steak in pan and don’t move it for 3–4 minutes (for medium-rare, adjust time depending on thickness). Flip and cook another 3–4 minutes.
- Add flavor
- Lower heat slightly, add butter, garlic, and rosemary/thyme. Tilt pan and spoon melted butter over the steaks for 1–2 minutes.
- Check doneness
- Use a meat thermometer:
- Rare: 125°F (52°C)
- Medium-rare: 130–135°F (55–57°C)
- Medium: 140°F (60°C)
- Use a meat thermometer:
- Rest before serving
- Transfer steaks to a plate, cover loosely with foil, and rest 5 minutes so juices redistribute.
- Serve
- Plate with roasted vegetables, fresh herbs, and a dipping sauce (garlic butter, peppercorn, or horseradish cream).
✨ Tips
- Pat steak dry well — moisture prevents browning.
- For extra flavor, dry brine: season steak with salt a few hours ahead and refrigerate uncovered.
- Use high smoke point oil (canola, grapeseed) for searing before adding butter.