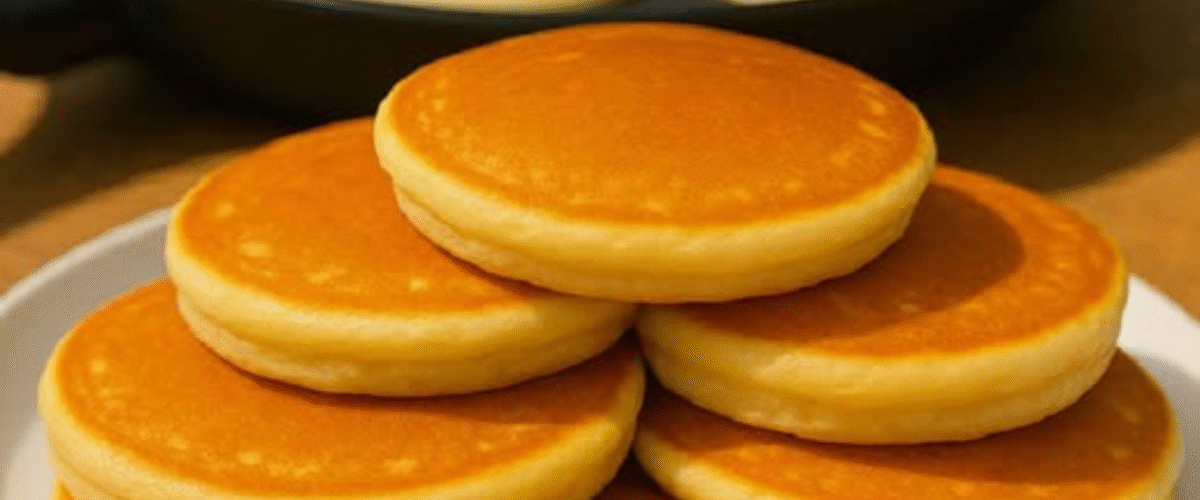
Es gibt nichts Schöneres als den Duft frischer Pfannkuchen, die an einem Wochenendmorgen auf dem Grill brutzeln. Diese perfekten hausgemachten Pfannkuchen bieten alles, was man sich von einem Frühstücksklassiker wünscht: Sie sind unglaublich fluffig, goldbraun und haben diese zarte, zartschmelzende Konsistenz, die jeden Morgen zu etwas Besonderem macht. Ob für das Familienfrühstück, den Wochenendbrunch oder einen besonderen Anlass – dieses kinderleichte Rezept sorgt jedes Mal für gleichbleibend leckere Ergebnisse.
Zutaten
Trockene Zutaten
- Allzweckmehl : 2 Tassen (240 g / 8,5 oz)
- Kristallzucker : 2 Esslöffel (25 g / 0,9 oz)
- Backpulver : 2 Teelöffel (8 g / 0,3 oz)
- Salz : 1 Teelöffel (5 g / 0,2 oz)
Nasse Zutaten
- Milch : 1¾ Tassen (420 ml / 14 fl oz)
- Große Eier : 2 (100 g / 3,5 oz)
- Geschmolzene Butter : 4 Esslöffel (56 g / 2 oz)
- Vanilleextrakt : 1 Teelöffel (5 ml / 0,2 fl oz)
Zum Kochen
- Butter oder Öl zum Einfetten : Nach Bedarf
Schritt-für-Schritt-Anleitung für fluffige Pfannkuchen
Schritt 1: Trockene Zutaten mischen
Sieben Sie zunächst Mehl, Zucker, Backpulver und Salz in eine große Rührschüssel. Dieses Sieben ist entscheidend, da es die Zutaten nicht nur gleichmäßig vermischt, sondern auch das Mehl auflockert, was wesentlich zu leichteren, fluffigeren Pfannkuchen beiträgt. Wenn Sie kein Sieb haben, können Sie die trockenen Zutaten auch kräftig mit einem Schneebesen verrühren, um ähnliche Ergebnisse zu erzielen. Achten Sie darauf, dass keine Backpulverklumpen in der Mischung sichtbar sind.
Schritt 2: Nasse Zutaten vermischen
In einer separaten mittelgroßen Schüssel Milch, Eier, geschmolzene Butter und Vanilleextrakt verquirlen, bis die Mischung glatt und gut vermischt ist. Die Eier sollten vollständig und ohne sichtbare Streifen eingearbeitet sein, und die geschmolzene Butter sollte gleichmäßig in der Flüssigkeit verteilt sein. Achten Sie darauf, dass die geschmolzene Butter nicht zu heiß ist, da die Eier sonst beim Vermischen garen könnten. Lassen Sie die Butter bei Bedarf etwas abkühlen.
Schritt 3: Den Teig herstellen
Gießen Sie die flüssige Zutatenmischung in die Schüssel mit den trockenen Zutaten. Verrühren Sie alles vorsichtig mit einem Holzlöffel oder Gummispatel, bis alles gut vermischt ist. Dies ist der wichtigste Schritt bei der Pfannkuchenzubereitung – der Teig sollte leicht klumpig und rau aussehen, nicht glatt. Ein paar Mehlstreifen sind völlig in Ordnung und sogar erwünscht. Zu starkes Verrühren führt dazu, dass sich Gluten im Mehl bildet, was zu zähen, gummiartigen Pfannkuchen führt, anstatt der gewünschten lockeren, lockeren Konsistenz.
Schritt 4: Vorheizen der Grillplatte
Heat your griddle, large skillet, or frying pan over medium heat for about 3-4 minutes. The surface should be hot enough that a drop of water sizzles and evaporates immediately upon contact. Lightly grease the cooking surface with butter or a neutral oil like vegetable or canola oil. A properly heated and greased griddle is essential for achieving that beautiful golden-brown exterior while ensuring the pancakes don’t stick.
Step 5: Cooking the Pancakes
Using a ¼ cup measuring cup or ladle, pour the batter onto the hot griddle, spacing pancakes about 2 inches apart to allow for spreading. Cook without moving them until bubbles begin to appear on the surface and the edges start to look set and slightly dry, typically 2-3 minutes. This is your cue to flip. Use a thin spatula to carefully flip each pancake and cook for an additional 1-2 minutes until the bottom is golden brown and the pancake feels set when gently pressed.
Step 6: Serving
Transfer the cooked pancakes immediately to serving plates or keep them warm in a 200°F (93°C) oven while you finish cooking the remaining batter. Serve your pancakes hot with your favorite toppings. Traditional maple syrup, fresh berries, sliced bananas, whipped cream, or even a simple dusting of powdered sugar can transform these pancakes into a memorable breakfast experience.
Nutritional Information and Timing
Prep Time: 10 minutes
Cook Time: 15-20 minutes
Total Time: 25-30 minutes
Yield: 12-14 medium pancakes
Serving Size: 2-3 pancakes
Approximate Nutritional Information per Serving (2 pancakes):
- Calories: 185
- Carbohydrates: 28g
- Fat: 6g
- Protein: 6g
- Fiber: 1g
- Sugar: 6g
- Sodium: 425mg
Note: Nutritional values are estimates and may vary based on specific ingredients used and pancake size.
Variations and Substitutions
Buttermilk Pancakes: Replace regular milk with buttermilk for tangier, more tender pancakes. The acidity in buttermilk reacts with the baking powder to create extra lift and fluffiness.
Whole Wheat Option: Substitute up to half the all-purpose flour with whole wheat flour for added nutrition and a nuttier flavor. You may need to add an extra tablespoon or two of milk to maintain the proper batter consistency.
Berry Pancakes: Gently fold ½ cup of fresh or frozen blueberries, raspberries, or chopped strawberries into the batter just before cooking. If using frozen berries, don’t thaw them first to prevent bleeding.
Chocolate Chip Delight: Add ⅓ cup of mini chocolate chips to the batter for an indulgent treat that’s perfect for special occasions or weekend mornings.
Dairy-Free Alternative: Replace milk with your favorite plant-based milk such as almond, oat, or soy milk. Use melted coconut oil or vegan butter in place of regular butter.
Protein-Packed Version: Add 1-2 scoops of vanilla protein powder, reducing the flour by ¼ cup to compensate. This creates satisfying pancakes perfect for post-workout breakfasts.
Spiced Pancakes: Incorporate warm spices like ½ teaspoon cinnamon, ¼ teaspoon nutmeg, or a pinch of cardamom for aromatic, comforting flavors.
Lemon Ricotta Pancakes: Add ½ cup ricotta cheese and 1 tablespoon fresh lemon zest to the wet ingredients for incredibly fluffy, restaurant-style pancakes.
Frequently Asked Questions
Why are my pancakes not fluffy? The most common cause is over-mixing the batter. When you mix pancake batter too vigorously or for too long, you develop the gluten in the flour, which creates tough, dense pancakes. Mix just until the ingredients are barely combined, leaving lumps in the batter. Also, ensure your baking powder is fresh – it loses potency over time and should be replaced every 6-12 months.
How do I know when to flip my pancakes? Watch for bubbles to form on the surface of the pancake and for the edges to look set and slightly dry. The bubbles should pop and leave little holes that don’t immediately fill back in. This usually takes 2-3 minutes on medium heat. If you flip too early, the pancake may fall apart; if you wait too long, the bottom may burn.
Can I make pancake batter ahead of time? It’s best to use pancake batter immediately for optimal fluffiness, but you can refrigerate it for up to 2 hours. The batter will thicken as it sits, so you may need to thin it with a little extra milk. Give it a very gentle stir before using, being careful not to over-mix. For longer storage, consider making a large batch and freezing the cooked pancakes instead.
What’s the best way to keep pancakes warm while cooking multiple batches? Preheat your oven to 200°F (93°C) and place cooked pancakes on a baking sheet in a single layer. This keeps them warm without continuing to cook them. Avoid stacking hot pancakes, as this can make them soggy from trapped steam. If you must stack them, place parchment paper between layers.
Can I freeze leftover pancakes? Absolutely! Cool the pancakes completely, then place them in a single layer on a baking sheet and freeze until solid. Transfer to freezer bags or containers and store for up to 3 months. To reheat, pop them in the toaster, toaster oven, or microwave. They’re perfect for quick weekday breakfasts when you’re short on time.
Diese perfekten hausgemachten Pfannkuchen vereinen Einfachheit und Technik perfekt und beweisen, dass die besten Wohlfühlgerichte oft aus einfachen, sorgfältig zubereiteten Zutaten bestehen. Ob Sie eine besondere Frühstückstradition am Wochenende schaffen, Ihre Gäste beim Brunch beeindrucken oder sich einfach selbst etwas Leckeres gönnen möchten – diese Pfannkuchen liefern die fluffige, goldbraune Perfektion, die jeden Morgen unvergesslich macht. Mit etwas Übung entwickeln Sie ein intuitives Gespür für die Teigkonsistenz und die Garzeit, die jedes Mal für gelungene Pfannkuchen sorgt.