Einführung
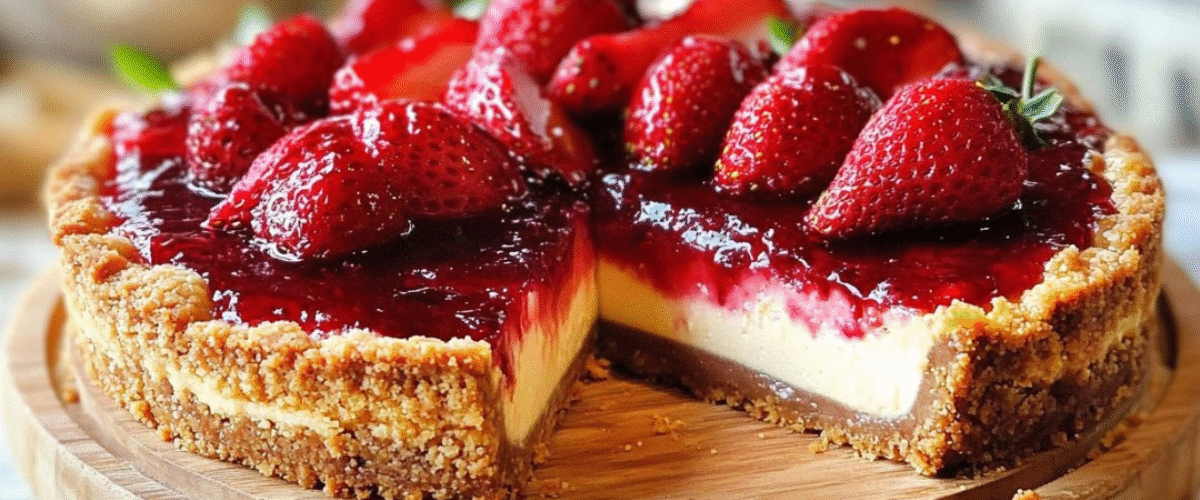
Genießen Sie die herrlich cremige Textur und die dezente Süße dieses italienisch inspirierten Ricotta-Käsekuchens. Dieses elegante Dessert vereint die luftig-leichte Qualität von Ricotta mit einer nussigen Haselnusskruste für eine perfekte Balance aus Aromen und Texturen. Mit leuchtenden Erdbeeren und süßer Marmelade garniert, ist dieser Käsekuchen ein beeindruckender Blickfang für jeden Anlass, vom gemütlichen Familientreffen bis zur besonderen Feier. Die Schönheit dieses Rezepts liegt in seiner Einfachheit – ein wahrer Beweis für die italienische Kochphilosophie, dass hochwertige Zutaten nur minimale Eingriffe benötigen, um zu glänzen.
Zutaten
Für den Haselnussboden:
- 160 g (1¼ Tassen) Mehl Typ 00
- 70 g (⅔ Tasse) Haselnussmehl
- 100 g (½ Tasse) brauner Zucker
- 5 g (1 Teelöffel) Backpulver
- 1 Teelöffel Vanilleextrakt
- 80 g (⅓ Tasse) Butter, kalt und gewürfelt
- 1 ganzes Ei
- Schale von 1 Zitrone
Für die Ricotta-Füllung:
- 400 g (1¾ Tassen) Ricotta-Käse
- 1 Glas (150 g) Naturjoghurt
- 125 g (⅔ Tasse) Kristallzucker
- 1 Teelöffel Vanilleextrakt
- Schale von 1 Zitrone
- 3 große Eier
Für den Belag:
- 4-5 Esslöffel Ihrer Lieblingsmarmelade (Erdbeere oder Beerenmarmelade eignet sich gut)
- 200 g (1½ Tassen) frische Erdbeeren, in Scheiben geschnitten
Anweisungen
- Bereiten Sie Ihre Ausrüstung vor : Heizen Sie Ihren Backofen auf 170 °C (338 °F) vor. Fetten Sie eine Springform (20–22 cm) ein und legen Sie sie mit Backpapier aus.
- Haselnusskruste zubereiten : In einer großen Rührschüssel Mehl 00, Haselnussmehl, braunen Zucker und Backpulver vermengen. Gut verrühren, um eine gleichmäßige Verteilung der Zutaten zu gewährleisten.
- Die kalte, gewürfelte Butter zur Mehlmischung geben und mit den Fingerspitzen einarbeiten, bis eine sandig-krümelige Masse entsteht.
- Das ganze Ei, den Vanilleextrakt und die Zitronenschale zur Mischung hinzufügen. Alles miteinander verrühren, bis ein glatter Teig entsteht.
- Wickeln Sie den Teig in Frischhaltefolie ein und legen Sie ihn mindestens 30 Minuten lang in den Kühlschrank, damit er ruhen und fest werden kann.
- Bereiten Sie die Ricotta-Füllung vor : Während der Teig ruht, geben Sie den Ricotta in eine große Schüssel und schlagen Sie ihn, bis er glatt und cremig ist.
- Joghurt, Kristallzucker, Vanilleextrakt und Zitronenschale zum Ricotta geben. Gut verrühren, bis alles gut vermischt ist.
- Fügen Sie die Eier einzeln hinzu und verrühren Sie sie nach jeder Zugabe gut, um eine glatte, homogene Füllung zu erhalten.
- Den Käsekuchen zusammensetzen : Den gekühlten Teig aus dem Kühlschrank nehmen und auf eine leicht bemehlte Fläche legen.
- Rollen Sie den Teig auf eine Dicke von etwa 5 mm (¼ Zoll) aus und achten Sie darauf, dass er groß genug ist, um Ihre Kuchenform mit etwas Überhang auszukleiden.
- Den ausgerollten Teig vorsichtig in die vorbereitete Kuchenform geben und leicht am Boden und an den Seiten andrücken, sodass eine Kruste entsteht. Überstehenden Teig an den Rändern abschneiden.
- Gießen Sie die Ricotta-Füllung in die Kruste und glätten Sie die Oberfläche mit einem Spatel.
- Bake the cheesecake: Place the cake tin in the preheated oven and bake for 45-50 minutes, or until the filling is set but still has a slight wobble in the center.
- Once baked, turn off the oven and leave the cheesecake inside with the door slightly ajar for about 30 minutes to prevent it from cracking due to sudden temperature changes.
- Remove from the oven and allow to cool completely at room temperature.
- Decorate and serve: Once completely cooled, carefully transfer the cheesecake to a serving plate.
- Spread a layer of jam evenly over the top of the cheesecake.
- Arrange the sliced strawberries decoratively over the jam layer.
- Refrigerate for at least 2 hours before serving to allow the flavors to meld together and the cheesecake to set completely.
Nutritional Information and Timing
Preparation Time: 30 minutes Resting Time: 30 minutes Baking Time: 45-50 minutes Cooling Time: 2-3 hours Total Time: 4 hours Serves: 8-10 slices
Nutritional Information (per slice, based on 10 servings):
- Calories: 320 kcal
- Carbohydrates: 35g
- Protein: 9g
- Fat: 16g
- Saturated Fat: 8g
- Cholesterol: 95mg
- Fiber: 2g
- Sugar: 24g
- Sodium: 95mg
Cooking Tips and Tricks
- Room temperature ingredients: Allow the ricotta, yogurt, and eggs to come to room temperature before mixing. This ensures a smoother filling with fewer lumps.
- Perfectly smooth ricotta: For an ultra-smooth filling, pass the ricotta through a fine-mesh sieve before mixing with the other ingredients.
- Prevent crust shrinkage: When lining the cake tin with dough, make sure it’s not stretched too thin, as this can cause shrinkage during baking. Let the dough rest in the refrigerator for the full 30 minutes to prevent shrinkage.
- Baking perfection: To check if your cheesecake is done, gently shake the pan – the center should have a slight wobble but not be liquid. The edges should be set and lightly golden.
- Preventing cracks: Avoid opening the oven door during baking, as sudden temperature changes can cause your cheesecake to crack. The slow cooling method (leaving it in the turned-off oven with the door ajar) helps prevent cracks.
- Chilling for best results: For the best flavor and texture, refrigerate the cheesecake for at least 2 hours or overnight before serving. This allows the flavors to develop fully.
Variations and Substitutions
- Alternative nuts: If hazelnuts aren’t available, substitute with almond flour, walnut flour, or even ground pistachios for a different flavor profile.
- Gluten-free option: Replace the 00 flour with a gluten-free all-purpose flour blend at a 1:1 ratio to make this dessert suitable for those with gluten sensitivities.
- Dairy alternatives: For a lighter version, use low-fat ricotta and yogurt. For a dairy-free version, substitute with dairy-free alternatives like almond-based yogurt and tofu-based “ricotta.”
- Seasonal fruit toppings: Adapt the topping to whatever fruits are in season – blueberries, raspberries, peaches, or figs all work beautifully. In winter, try poached pears or citrus segments.
- Flavor variations: Add a tablespoon of limoncello to the filling for a more pronounced lemon flavor, or substitute the vanilla extract with almond extract for a different aromatic note.
- Chocolate lover’s version: Add 2 tablespoons of cocoa powder to the crust mixture and fold 100g of chocolate chips into the ricotta filling for a chocolatey twist.
Common FAQs
Why is my ricotta filling grainy?
Ricotta naturally has some texture. For a smoother cheesecake, pass the ricotta through a fine-mesh sieve before mixing, or blend it in a food processor until smooth. Also, ensure all ingredients are at room temperature before mixing.
Can I make this cheesecake ahead of time?
Absolutely! This cheesecake actually improves with time as the flavors meld together. You can make it up to 2 days ahead of serving. Add the fresh fruit topping just before serving for the best presentation.
My cheesecake cracked during baking. What went wrong?
Cracks usually occur due to sudden temperature changes or overbaking. Next time, try using a water bath (placing the springform pan in a larger pan filled with hot water) during baking, and follow the slow cooling method described in the recipe.
Can I freeze this ricotta cheesecake?
Yes, you can freeze the baked and cooled cheesecake (without the toppings) for up to 1 month. Wrap it well in plastic wrap and aluminum foil. Thaw overnight in the refrigerator and add the toppings before serving.
What’s the difference between ricotta cheesecake and regular cheesecake?
Ricotta cheesecake has a lighter, slightly grainy texture compared to the dense creaminess of traditional cream cheese cheesecakes. The Italian-style version has a more subtle sweetness and a unique flavor profile that pairs wonderfully with fruit.
Storage and Make-Ahead Tips
- Refrigeration: Store the cheesecake covered in the refrigerator for up to 5 days. The flavors will continue to develop during this time, often making it even more delicious on the second or third day.
- Freezing: To freeze, wrap the plain cheesecake (without jam or fruit topping) tightly in plastic wrap, then in aluminum foil. Freeze for up to 1 month. Thaw overnight in the refrigerator before decorating and serving.
- Make-ahead components: The hazelnut crust dough can be made up to 2 days ahead and stored in the refrigerator, or frozen for up to a month. The ricotta filling can be prepared a day ahead and stored covered in the refrigerator.
- Zubereitung des Belags : Bereiten Sie die Marmeladenschicht bis zu einem Tag im Voraus zu, geben Sie die frischen Erdbeeren jedoch erst kurz vor dem Servieren hinzu, damit sie frisch und leuchtend bleiben.
- Serviervorschlag : Für eine elegante Präsentation den Rand des Käsekuchens mit Puderzucker bestäuben und mit frischen Minzblättern garnieren. Für einen besonders köstlichen Genuss mit einem Klecks Schlagsahne oder einer Kugel Vanilleeis servieren.
Dieser hausgemachte Ricotta-Käsekuchen vereint das Beste der italienischen Backtradition – hochwertige Zutaten, einfache Zubereitung und ein rustikales und zugleich raffiniertes Ergebnis. Die Kombination aus nussigem Haselnussboden und cremiger Ricotta-Füllung bildet die perfekte Grundlage für saisonale Früchte und macht ihn zu einem vielseitigen Dessert, das sich das ganze Jahr über variieren lässt. Ob bei einem Familientreffen oder als Abschluss eines eleganten Abendessens – dieser Käsekuchen besticht durch seine schöne Optik und sein köstliches Geschmacksprofil.