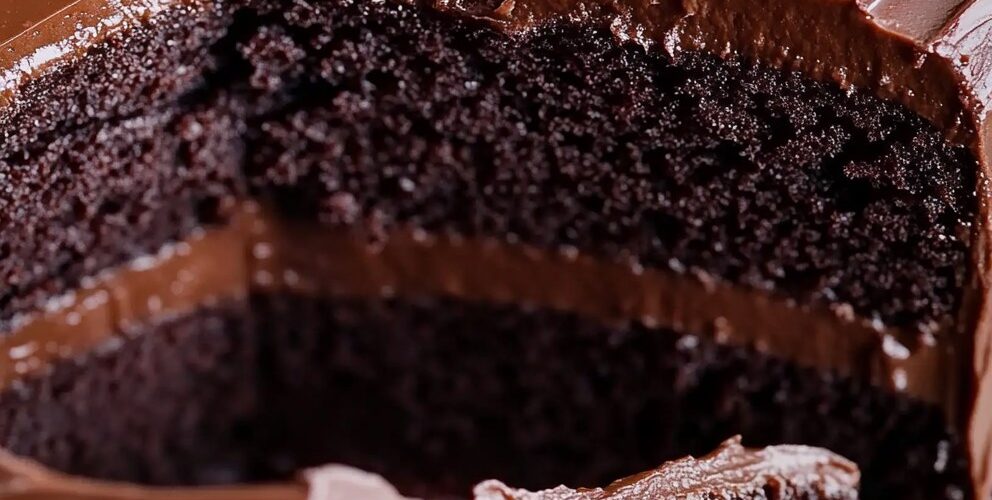
Einführung: Purer Schokoladengenuss
Ein perfekt gebackener Schokoladenkuchen hat etwas Magisches. Reichhaltig, unglaublich saftig und mit einem seidigen Schokoladenüberzug überzogen, der auf der Zunge zergeht. Dieses dekadente Schokoladenkuchenrezept bietet genau dieses Erlebnis – ein intensiv schokoladiges Dessert, das alltägliche Momente in besondere Momente verwandelt. Ob Sie einen besonderen Anlass feiern oder einfach nur Lust auf etwas Süßes haben – dieser Kuchen ist der Traum eines jeden Schokoladenliebhabers.
Zutaten
Für den Kuchen:
- 1 3/4 Tassen Allzweckmehl (220 g / 7,8 oz)
- 1 1/2 Teelöffel Backpulver (7 g)
- 1 1/2 Teelöffel Backpulver (7 g)
- 1/2 Teelöffel Salz (3 g)
- 3/4 Tasse ungesüßtes Kakaopulver (75 g / 2,6 oz)
- 2 Tassen Kristallzucker (400 g)
- 2 große Eier, Zimmertemperatur
- 1 Tasse Vollmilch (240 ml)
- 1/2 Tasse Pflanzenöl (120 ml / 4 fl oz)
- 2 Teelöffel Vanilleextrakt (10 ml)
- 1 Tasse kochendes Wasser (240 ml)
Für das Schokoladen-Frosting:
- 1/2 Tasse ungesalzene Butter (113 g / 4 oz)
- 2/3 Tasse ungesüßtes Kakaopulver (65 g)
- 3 Tassen Puderzucker (360 g)
- 1/3 Tasse Vollmilch (80 ml / 2,7 fl oz)
- 1 Teelöffel Vanilleextrakt (5 ml)
- Prise Salz
Anweisungen
Für den Schokoladenkuchen:
- Heizen Sie Ihren Backofen auf 175 °C (350 °F) vor. Fetten Sie zwei runde Kuchenformen (23 cm Durchmesser) gründlich ein und legen Sie den Boden mit Backpapier aus. Bestäuben Sie die Seiten mit Mehl oder Kakaopulver und klopfen Sie überschüssiges Mehl ab.
- In einer mittelgroßen Schüssel Mehl, Backpulver, Natron, Salz und Kakaopulver verquirlen, bis alles gut vermischt ist und keine Kakaoklumpen mehr sichtbar sind.
- In einer großen Rührschüssel Zucker, Eier, Milch, Pflanzenöl und Vanilleextrakt vermengen. Mit einem elektrischen Mixer bei mittlerer Geschwindigkeit etwa 2 Minuten lang schlagen, bis die Mischung glatt und gut vermischt ist.
- Geben Sie die trockenen Zutaten bei niedriger Geschwindigkeit des Mixers nach und nach in Portionen zur feuchten Mischung hinzu und verrühren Sie sie nach jeder Zugabe, bis sie gut vermischt sind. Kratzen Sie den Schüsselrand nach Bedarf ab, um eine gleichmäßige Mischung zu gewährleisten.
- Geben Sie das kochende Wasser vorsichtig zum Teig und rühren Sie bei niedriger Geschwindigkeit, bis alles gut vermischt ist. Der Teig wird recht dünnflüssig sein – das ist normal und sorgt für die charakteristische feuchte Konsistenz des Kuchens.
- Den Teig gleichmäßig auf die vorbereiteten Kuchenformen verteilen. Jede Form mehrmals leicht auf die Arbeitsfläche klopfen, um große Luftblasen zu entfernen.
- Im vorgeheizten Ofen 30–35 Minuten backen oder bis ein in die Mitte gesteckter Zahnstocher sauber oder mit ein paar feuchten Krümeln (aber keinem nassen Teig) herauskommt.
- Lassen Sie die Kuchen 10 Minuten in den Formen abkühlen und lösen Sie sie dann mit einem Messer am Rand. Stürzen Sie die Kuchen auf ein Kuchengitter, ziehen Sie das Backpapier ab und lassen Sie sie vor dem Glasieren vollständig abkühlen.
Für das Schokoladen-Frosting:
- In einem mittelgroßen Topf die Butter bei schwacher Hitze schmelzen, dabei darauf achten, dass sie nicht braun wird.
- Once melted, remove from heat and whisk in the cocoa powder until smooth and glossy.
- Gradually add the powdered sugar, alternating with the milk, whisking continuously until smooth. Add the vanilla extract and pinch of salt, mixing until fully incorporated.
- If the frosting seems too thick, add a little more milk, one teaspoon at a time. If too thin, add additional powdered sugar, one tablespoon at a time, until you reach the desired spreading consistency.
Assembly:
- Once the cake layers are completely cool, place one layer on a serving plate or cake stand.
- Spread approximately one-third of the frosting over the top of the first layer, extending it just to the edges.
- Carefully place the second cake layer on top, ensuring it’s centered.
- Apply a thin layer of frosting all over the cake to seal in crumbs (this is called a “crumb coat”), then refrigerate for 15-20 minutes to set.
- Spread the remaining frosting over the top and sides of the cake, creating decorative swirls if desired.
- Allow the frosting to set for about 30 minutes before slicing and serving.
Nutritional Information and Timing
Preparation Time: 25 minutes
Cooking Time: 30-35 minutes
Cooling Time: 2 hours
Total Time: Approximately 3 hours
Servings: 12 slices
Nutritional Information (per slice):
- Calories: 525
- Protein: 6g
- Carbohydrates: 80g
- Fiber: 4g
- Fat: 22g
- Saturated Fat: 8g
- Cholesterol: 55mg
- Sodium: 340mg
- Sugar: 60g
- Calcium: 80mg
- Iron: 2mg
Cooking Tips and Tricks
- Coffee Substitution: For an even deeper chocolate flavor without adding coffee taste, substitute the boiling water with hot freshly brewed coffee. The heat activates the cocoa while the coffee enhances the chocolate notes.
- Room Temperature Ingredients: Ensure eggs and milk are at room temperature before mixing. This creates a smoother batter and more even incorporation of ingredients.
- Don’t Overmix: Once you add the flour, mix just until combined. Overmixing develops gluten, which can result in a tougher cake.
- Even Baking: For perfectly level cake layers, use cake strips around your pans or reduce oven temperature to 325°F (165°C) and extend baking time by 5-7 minutes.
- Testing Doneness: The toothpick test is reliable, but you can also gently press the center of the cake – it should spring back when fully baked.
- Cooling Completely: Patience is key! Ensure the cake layers are completely cool before frosting to prevent melting and sliding.
- Frosting Technique: For a smoother finish, heat your metal spatula or knife under hot water, wipe dry, and then use it to spread the frosting.
Variations and Substitutions
- Gluten-Free Version: Replace all-purpose flour with a 1:1 gluten-free flour blend that contains xanthan gum.
- Dairy-Free Alternative: Use plant-based milk (almond, oat, or soy) and dairy-free butter substitutes in both the cake and frosting.
- Reduced Sugar Option: Decrease sugar in the cake to 1 1/2 cups and use 2 1/2 cups powdered sugar in the frosting for a less sweet version.
- Flavor Variations:
- Add 1 teaspoon of espresso powder to the dry ingredients
- Include 1/2 teaspoon of cinnamon and a pinch of cayenne for a Mexican chocolate twist
- Mix in 1 tablespoon of orange zest to the batter for chocolate-orange flavor
- Add 1/4 teaspoon of almond extract to the batter for subtle depth
- Frosting Alternatives:
- Cream cheese frosting with a touch of cocoa
- Vanilla buttercream for contrast
- Chocolate ganache for an extra-decadent coating
- Filling Options:
- Spread raspberry jam between layers
- Add a layer of chocolate mousse
- Include sliced strawberries on top of the filling
Common FAQs
Q: Why is my cake batter so thin? Did I do something wrong?
A: The thin batter is intentional and a hallmark of this recipe! The addition of boiling water creates a loose batter that results in an exceptionally moist cake with tender crumb. Trust the process – it works!
Q: Can I make this cake in advance?
A: Yes! The cake layers can be baked up to 2 days ahead, cooled completely, and wrapped tightly in plastic wrap. Store at room temperature. The frosting can be made 1 day ahead and stored in the refrigerator – just bring to room temperature and re-whip before using.
Q: My cake is sticking to the pan. How can I prevent this?
A: Be thorough when preparing your pans: grease them generously, line the bottoms with parchment paper, and dust the sides with either flour or cocoa powder. Allow the cakes to cool for exactly 10 minutes in the pans before removing – too soon and they may break, too long and they might stick.
Q: Can I use natural cocoa powder instead of Dutch-processed?
A: This recipe works with either type of cocoa powder. Natural cocoa powder will give a slightly more acidic flavor profile, while Dutch-processed provides a smoother, mellower chocolate taste.
Q: How do I convert this recipe for cupcakes?
A: This batter yields approximately 24-30 standard cupcakes. Fill liners 2/3 full and bake at 350°F (175°C) for 18-22 minutes. Reduce the frosting recipe by 1/3 for a perfect amount to top the cupcakes.
Storage and Make-Ahead Tips
- Room Temperature Storage: The frosted cake can be stored at room temperature, covered with a cake dome or loosely with plastic wrap, for up to 3 days.
- Refrigeration: For longer storage, refrigerate the frosted cake, covered, for up to 5 days. Allow slices to come to room temperature before serving for the best flavor and texture.
- Freezing Unfrosted Layers:
- Cool completely
- Wrap each layer individually in plastic wrap, then in aluminum foil
- Freeze for up to 2 months
- Vor dem Auspacken und Glasieren über Nacht im Kühlschrank auftauen lassen
- Einfrieren des glasierten Kuchens:
- Legen Sie den glasierten Kuchen unbedeckt in den Gefrierschrank, bis der Zuckerguss fest wird
- Wickeln Sie den gesamten Kuchen fest in Frischhaltefolie und dann in Aluminiumfolie ein
- Bis zu 1 Monat einfrieren
- Über Nacht im Kühlschrank mit intakter Verpackung auftauen lassen, dann vor dem Servieren auf Zimmertemperatur bringen
- Zeitplan für die Vorbereitung besonderer Anlässe:
- Bis zu 2 Monate vorher: Tortenböden backen und einfrieren
- 2 Tage vorher: Tortenböden im Kühlschrank auftauen
- 1 Tag vorher: Zuckerguss zubereiten und Kuchen zusammensetzen
- Tag des Servierens: 1-2 Stunden vor dem Servieren auf Raumtemperatur bringen
Dieser Schokoladenkuchen mit samtigem Zuckerguss ist der Inbegriff eines perfekten Schokoladendesserts. Die Kombination aus saftigen, zarten Kuchenschichten und reichhaltigem, geschmeidigem Zuckerguss sorgt für ein Schokoladenerlebnis, das zugleich wohltuend und luxuriös ist. Ob bei einer Geburtstagsfeier, einem Feiertagstreffen oder einfach als Wochenend-Leckerbissen – dieser Kuchen sorgt garantiert für begeisterte Seufzer und den Wunsch nach einem zweiten Stück.