Einführung
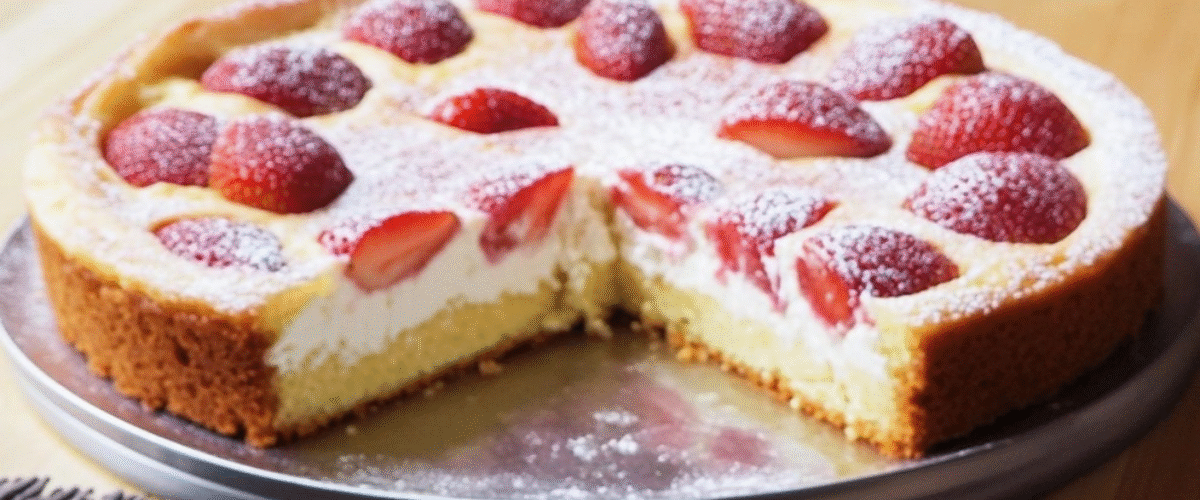
Versetzen Sie sich mit diesem exquisiten Ricotta-Erdbeer-Kuchen in die italienische Landschaft. Zarte Schichten luftigen Biskuits, getränkt in duftendem Zitronensirup, umhüllen eine traumhafte Wolke aus Ricotta-Erdbeer-Creme. Die Kombination aus säuerlichen frischen Erdbeeren und cremigem Ricotta schafft eine perfekte Balance – erfrischend und doch köstlich. Dieses atemberaubende Dessert vereint klassische italienische Aromen in einer raffinierten Präsentation, die garantiert bei jedem Anlass beeindruckt – vom gemütlichen Familienessen bis zum besonderen Anlass. Leicht genug für den Sommer, aber wohltuend genug für jede Jahreszeit – dieser Kuchen ist ein wahrer Beweis für die Magie, die entsteht, wenn einfache, hochwertige Zutaten zusammenkommen.
Zutaten
Für den Biskuitboden:
- 2 mittelgroße Eier, Zimmertemperatur (insgesamt ca. 100 g)
- ⅓ Tasse (40 g) Mehl Typ 00
- 5 ½ EL (70 g) Kristallzucker
- 1 EL (20 g) Wildblütenhonig
- Schale einer halben Zitrone
Für den Zitronensirup:
- ⅔ Tasse (160 ml) Wasser
- Schale einer halben Zitrone
- 75 g (⅓ Tasse + 1 EL) Kristallzucker
- ½ Vanilleschote, aufgeschnitten und ausgekratzt
Für die Erdbeerfüllung:
- 2 Tassen (300 g) frische Erdbeeren
- 1 ⅓ EL (20 ml) Sambuca (Anislikör)
- 3 ½ TL (15 g) Kristallzucker
Für die Ricottacreme:
- 1 ½ Tassen (350 g) Ricotta aus Kuhmilch
- ½ Tasse (120 ml) frische flüssige Sahne (Schlagsahne)
- 6 ¾ EL (50 g) Puderzucker
- 12 g Gelatineblätter (ungefähr 6–7 Blätter)
Schritt-für-Schritt-Anleitung
Zubereitung des Biskuits:
- Bereiten Sie Ihre Ausrüstung vor : Heizen Sie Ihren Backofen auf 175 °C (350 °F) vor. Fetten und bemehlen Sie zwei runde Kuchenformen (20 cm Durchmesser). Legen Sie den Boden mit Backpapier aus, damit sich der Kuchen leichter lösen lässt.
- Teig zubereiten : In einer großen Schüssel die zimmerwarmen Eier, Honig, Zitronenschale und Zucker verrühren. Mit einem Handrührgerät ca. 10 Minuten auf höchster Stufe schlagen, bis die Masse hell und locker ist und ihr Volumen verdreifacht hat. Der Teig sollte in Streifen zerfallen, wenn man den Rührbesen anhebt.
- Mehl hinzufügen : Das Mehl Typ 00 in 2-3 Portionen über die Eiermischung sieben und nach jeder Zugabe vorsichtig mit einem Schneebesen unterheben. Achten Sie darauf, durch leichte, streichende Bewegungen möglichst viel Volumen zu erhalten.
- Kuchen backen : Den Teig gleichmäßig auf die beiden vorbereiteten Kuchenformen verteilen. Im vorgeheizten Backofen 10 Minuten backen, oder bis die Kuchen leicht goldbraun sind und bei leichtem Druck zurückfedern.
- Vollständig abkühlen lassen : Aus dem Ofen nehmen und die Kuchen 5 Minuten in ihren Formen abkühlen lassen. Anschließend auf ein Kuchengitter stürzen und vollständig abkühlen lassen.
Zubereitung des Zitronensirups:
- Aromen entfalten : In einer kleinen Schüssel Wasser, Zitronenschale und das Mark einer halben Vanilleschote (plus Schote) vermischen. Etwa eine Stunde ziehen lassen, um das volle Aroma zu entfalten.
- Cook the syrup: Transfer the infused liquid to a small saucepan, add the sugar, and heat gently until the sugar completely dissolves. Do not boil.
- Strain and cool: Strain the syrup through a fine-mesh sieve to remove the zest and vanilla pod. Allow it to cool completely before using.
Preparing the Strawberries:
- Prepare the berries: Wash all strawberries thoroughly. Set aside about 1/3 of the berries for decoration. Hull and slice these decorative berries thinly and reserve.
- Process remaining berries: Hull and roughly chop the remaining strawberries. Place them in a bowl, sprinkle with the 3 ½ teaspoons of sugar, and allow them to macerate for 10 minutes. The sugar will draw out some of the juices.
- Cook with sambuca: Transfer the macerated strawberries to a small saucepan. Add the sambuca and cook over medium heat for 3-5 minutes, until the strawberries have softened but still maintain some texture. Remove from heat and allow to cool completely.
Creating the Ricotta Cream:
- Prepare the gelatin: Place the gelatin sheets in a bowl of cold water and let them soak for 5-10 minutes until soft and pliable.
- Process the ricotta: While the gelatin is soaking, push the ricotta cheese through a fine-mesh sieve into a large bowl to ensure it’s smooth and free of lumps.
- Activate the gelatin: Heat 2 tablespoons of the heavy cream in a small saucepan until warm (not boiling). Squeeze excess water from the gelatin sheets and stir them into the warm cream until completely dissolved.
- Combine components: Pour the gelatin mixture into the sieved ricotta and mix thoroughly. Fold in the cooled strawberry mixture until well combined.
- Incorporate whipped cream: In a separate bowl, whip the remaining heavy cream with the powdered sugar until stiff peaks form. Reserve a few tablespoons of this whipped cream for the final decoration. Gently fold the remaining whipped cream into the ricotta mixture until fully incorporated but still fluffy.
Assembling the Cake:
- Prepare the mold: Line an 8-inch (20cm) springform pan or cake ring with acetate strips for easy removal and a smooth finish.
- Layer the cake: Place the first genoise disk at the bottom of the prepared pan. Using a pastry brush, generously moisten it with the lemon syrup.
- Add the filling: Spread the ricotta-strawberry cream mixture evenly over the first cake layer.
- Complete the layers: Place the second genoise disk on top of the cream and brush generously with more lemon syrup.
- Chill: Cover the cake and refrigerate for at least 2 hours, or ideally overnight, to allow the flavors to meld and the cake to set properly.
- Finish and decorate: Once set, carefully remove the cake from the mold and peel away the acetate strip. Slightly thin the reserved whipped cream with a teaspoon of cream if necessary, then spread it over the top and sides of the cake as a light glaze. Arrange the reserved sliced strawberries decoratively on top of the cake.
Nutritional Information and Timing
Preparation Time: 45 minutes
Baking Time: 10 minutes
Chilling Time: 2 hours (minimum)
Total Time: 3 hours (minimum)
Servings: 8-10 slices
Nutritional Information (per slice, based on 10 servings):
- Calories: 290
- Protein: 7g
- Carbohydrates: 33g
- Fat: 14g
- Fiber: 1g
- Sugar: 26g
- Sodium: 65mg
Cooking Tips and Tricks
- Room temperature ingredients: Ensure your eggs are at room temperature before starting the genoise sponge. Cold eggs won’t whip to the same volume.
- Gentle folding technique: When incorporating flour into the egg mixture, use a figure-eight motion with a large spatula or whisk to maintain as much air as possible in the batter.
- Testing for doneness: The genoise is done when it’s lightly golden and springs back when gently touched. Avoid opening the oven during the first 7 minutes of baking.
- Syrup application: Apply the lemon syrup while the cake is still slightly warm to help it absorb better. Use a pastry brush for even distribution.
- Ricotta preparation: For the smoothest cream, let the ricotta come to room temperature before sieving it. This makes it easier to work with and ensures a silky texture.
- Gelatin handling: If using sheet gelatin, count your sheets carefully and ensure they’re fully hydrated before dissolving. If substituting powdered gelatin, use 1 tablespoon (about 10g) and bloom it according to package directions.
- Smooth finish: For perfectly smooth sides, chill the cake thoroughly before removing the acetate strip. A warm knife run around the outside can help release it cleanly.
Variations and Substitutions
- Flour alternatives: If Type 00 flour isn’t available, cake flour works as an excellent substitute. All-purpose flour can also be used, but the cake may be slightly less tender.
- Liqueur options: Not a fan of sambuca? Try Grand Marnier, Cointreau, or even amaretto for different flavor profiles. For an alcohol-free version, use orange juice with a touch of almond extract.
- Seasonal fruit swaps: Replace strawberries with raspberries, blackberries, or a mixture of summer berries. In winter, try poached pears or apples with cinnamon.
- Citrus variations: Substitute the lemon zest and syrup with orange or lime for a different citrus note throughout the cake.
- Cheese alternatives: For a lighter version, substitute half the ricotta with Greek yogurt. For a more decadent version, use mascarpone cheese instead of ricotta.
- Honey selection: Different honey varieties will add subtle flavor changes – try lavender honey with the strawberries for a beautiful aromatic combination.
- Gluten-free adaptation: Substitute the Type 00 flour with a good quality gluten-free flour blend and add ¼ teaspoon of xanthan gum for structure.
Common FAQs
Can I make this cake ahead of time?
Yes, this cake actually benefits from being made 1-2 days in advance. The flavors meld beautifully and the texture improves as the cake layers absorb the syrup. Keep refrigerated until about 30 minutes before serving.
My genoise sponge turned out flat. What went wrong?
The most common reasons for a flat genoise are under-whipping the egg mixture (it needs to triple in volume) or deflating the batter when adding the flour. Be very gentle when folding in the flour and avoid overmixing.
Can I use powdered gelatin instead of sheets?
Yes, substitute 1 tablespoon (about 10g) powdered gelatin for the sheets. Bloom it in 3 tablespoons of cold water for 5 minutes, then heat gently until dissolved before incorporating into the cream.
How can I tell if my ricotta cream has the right consistency?
The ricotta cream should be thick enough to hold its shape but still spreadable. If it seems too loose, chill it for 15-20 minutes before assembling the cake. If it’s too firm, gently fold in a tablespoon or two of whipped cream.
Can this cake be frozen?
While possible, freezing isn’t ideal for this cake as it may affect the texture of the ricotta cream. If necessary, freeze for up to 1 month, well-wrapped. Thaw overnight in the refrigerator before serving.
Storage and Make-Ahead Tips
- Refrigeration: Store the assembled cake in the refrigerator, covered with a cake dome or loosely with plastic wrap to prevent it from absorbing other odors. It will keep well for up to 3 days.
- Component preparation: The genoise sponge can be baked up to 2 days ahead and stored well-wrapped at room temperature. The lemon syrup can be made up to a week ahead and stored in the refrigerator in an airtight container.
- Partial assembly: You can soak the cake layers and assemble with the filling a day ahead, then add the final decoration just before serving for the freshest presentation.
- Leftover storage: Individual slices should be stored in airtight containers in the refrigerator and consumed within 2-3 days for best quality.
- Serving temperature: For the best flavor and texture, remove the cake from the refrigerator about 30 minutes before serving to take the chill off. This allows the flavors to bloom fully on the palate.
Genießen Sie diesen eleganten Ricotta-Erdbeer-Kuchen, der süße und säuerliche Aromen mit luxuriöser, leichter Textur perfekt ausbalanciert!